

One of those times should be a smooth one when you get a new iPhone. I have assisted hundreds of people with this same steps and the most common question I hear is: “How to Transfer Phone Number to New iPhone?
Whether you’re upgrading from an older iPhone, switching from an Android device, or you don’t even have your old phone anymore – this guide covers how to do all of the following in 2026! The majority of transfers are completed in less than 10 minutes. Here’s how to do it.
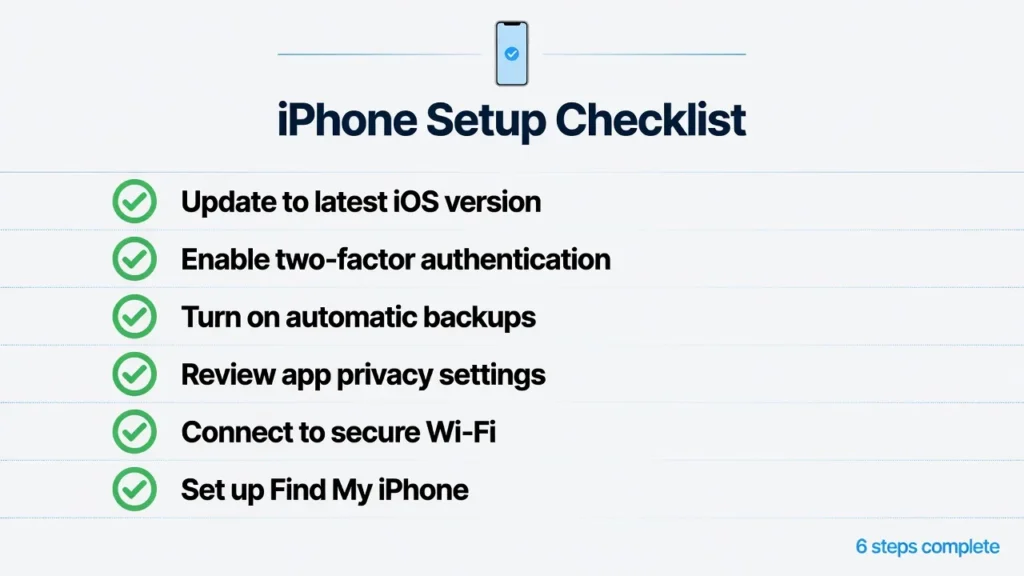
Before You Transfer Your Phone Number to a New iPhone: Full Checklist
Take 2 minutes to ensure all is ready before beginning the transfer. The number one cause of transfer failure and/or interruption is skipping prep — and I have seen it done more than I want to count.
This section teaches you about your iOS version, backups, and the five things both phones require before you start using them.
iOS Version and Device Compatibility
Both iPhones need iOS 16 or later for the eSIM Quick Transfer feature to work. The reason for this is stated in an official Apple support article, HT213483. It’s a hard requirement for iOS 16, meaning you can’t do it on older versions.
To verify the iOS version, follow Settings > General > About and view the Software Version line. Update the iPhone or iPad to iOS 15 or later, if it’s running that version. Go to Settings > General > Software Update to install the latest version of iOS – it’s free.
Installing the cellular service will be a lot smoother if both devices have this requirement before installation.
Quick Backup Safety Net (Recommended)
Always backup your iCloud, prior to starting any transfer. In the case of an interrupted transfer, or if you’ve mistakenly reset the wrong phone, a full iCloud backup enables you to restore all your data. I’ve watched people save themselves from a loss of all data due to this backup.
On the iPhone: go to Settings, click on your name at the top, then iCloud, iCloud Backup, and finally Back Up Now. Wait until it is fully loaded before continuing. You’ll save yourself a little bit of time and money if you have a backup before you transfer.
This is better than rebuilding your phone later which will involve 10-20 minutes of pain.
Complete Pre-Transfer Checklist
Before handling either phone, follow this checklist. All of these relate to a common transfer failure that I’ve encountered:
Both iPhones must be charged to at least 50% before you start — the transfer can take up to 30 minutes and a dead phone mid-transfer means starting over. If your phone isn’t charging right now, fix that first before continuing. Both devices are in ON (enabled) state for Bluetooth.
Both phones are connected to a reliable Wi-Fi connection.
Unlocked Old iPhone with Screen ON (Not Lock Screen)
Both phones kept within 3 feet of each other Carrier account PIN or password is easily accessible. Carrier account PIN and/or password is readily available.
Support for troubleshooting iPhone issues with users All items in this list are actual failure modes. One missed and that’s typically where the difficulty begins.
eSIM Quick Transfer: How to Transfer Phone Number to New iPhone (Fastest Method)
eSIM Quick Transfer is the quickest way to transfer your phone number to your new iPhone. I use this whenever both phones support it; it takes about 5 minutes, does not need a sim card, and you don’t have to call your carrier.
Method 1A: Transfer During New iPhone Setup
Step 1: Lock the both iPhones and turn on Bluetooth and lock the phones side-by-side.Step 1: Lock both iPhones and turn on Bluetooth and lock phones side-by-side.
Step 2: In a few seconds, a pop-up message appears on your older iPhone: “Set Up New iPhone”. Tap Continue.
Step 3: You will get an animation on your new iPhone’s screen. Place the old iPhone camera on it and scan it — just like you would scan a QR code. After scanning, the phones will be connected.
Step 4: When asked for the passcode of your old phone, type it in on your new phone.
Step 5: Set up Face ID and/or Touch ID on the new phone.
Step 6: On the screen “Transfer Your Data”, choose Transfer from iPhone and then tap the Transfer button next to the phone number.
Step 7: When you see the message, approve the transfer on your old iPhone. The two phones will both read “Transferring Cellular Plan. Wait until you see Transfer Complete on your old phone and Activation Complete on your new phone.
Method 1B: Transfer After Setup (Settings Method)
If you’ve already set up your new iPhone without transferring your number then follow these steps:
Step 1: Tap Settings on your new iPhone.
Step 2: Press Cellular (or Mobile Data in other areas).
Step 3: Tap on Add eSIM, located in the bottom of the screen.
Step 4: Choose Transfer From Nearby iPhone.
Step 5: Unlock your old iPhone and place it close to the new iPhone. A message will pop up to ask you whether you wish to convert your cell phone plan.
Step 6: In the old iPhone: Tap Transfer If asked, enter your carrier account pin.
Step 7: Check the progress bar of your new iPhone. Once done, your number should be listed “active” in Cellular settings, and the service on your old iPhone will be disabled.
What to Expect: Time and On-Screen Messages
Based on my experience, it takes around 5-10 minutes to transfer your phone number. If you also want to transfer all your data at the same time, then you may have to wait for 15-30 minutes depending on the content volume.
While transferring you’ll see messages such as “Transferring Cellular Plan” and “Activating. Several minutes of “Transferring” or “Activating” are entirely normal — just as long as you are seeing the spinning progress indicator, the process is happening. If there is no activity for 30 minutes, then try it again.
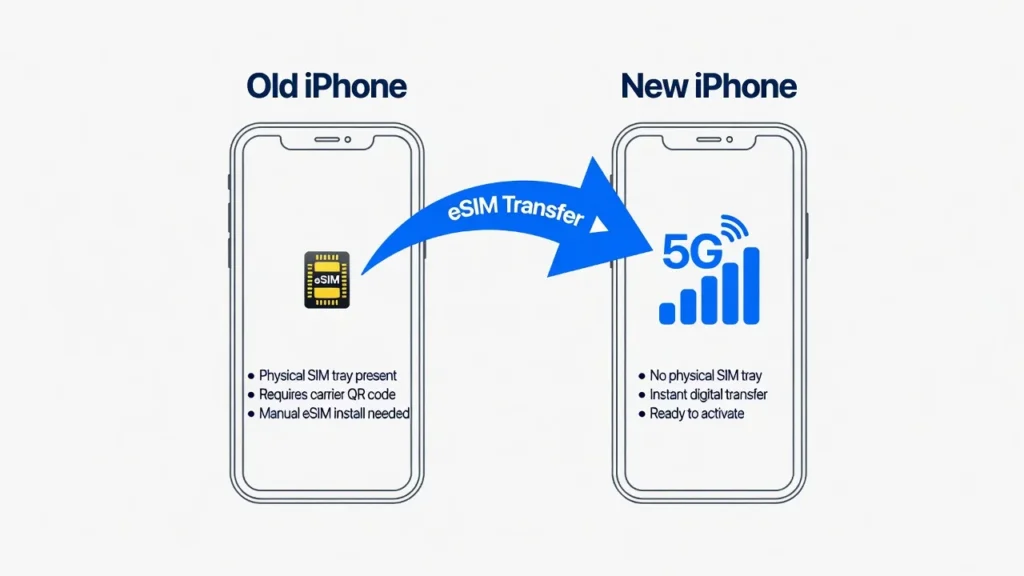
Important: Your Old Phone Must Already Have eSIM
You need to have an eSIM on your old iPhone to use eSIM Quick Transfer.
If you have a physical SIM on your old phone, you can follow one of two paths: Swap the physical SIM into the new phone (if it has a SIM slot), or convert the physical SIM to an eSIM on the old phone first, then transfer to the new phone via Quick Transfer. Both methods are covered in the sections below.
Physical SIM Card Transfer: Moving Your Number the Traditional Way
To transfer your number from your old iPhone to your new iPhone, all you need to do is move the small card from the old phone to the new one (if both phones have a SIM card slot).
This technique dates back to the first iPhone and is supported by all carriers the world over.
Tools You Need (SIM Ejector or Paperclip)
You have a small SIM ejector tool in the box, it’s a metal pin about 1″ long. If you can’t find it, a regular paperclip will do the job.
Take one end and straighten it and you have a thin, straight pin, about 1 inch long, that’s all you need.
Step-by-Step: Removing and Inserting SIM Card
Step 1: Removing and Inserting SIM Card To start, shut off both of the iPhones.
Step 2: Find the SIM Tray on your old iPhone (the small round pinhole on the right side of most iPhones (the top edge on some older iPhones)).
Step 3: Use the SIM ejector pin or straightened paper clip to insert into the pinhole. Press gently in, with slight pressure. The tray will spring out about ¼ inch.
Step 4: Remove the tray completely. A small chip with one angled corner is the SIM card, which is located inside.
Step 5: Carefully remove the SIM card. Grasp it from the sides, do not touch the gold connectors!
Step 6: Put the SIM card in your new iPhone’s SIM card slot. Fit the angled corner — it fits in only one direction. Don’t force it.
Step 7: Push the tray back into your new iPhone until it snaps into place.
Step 8: Turn on your brand-new iPhone. Within 1-2 minutes you should see your carrier name in the Status bar. If there is a SIM in your old iPhone, it will show you “No SIM” — there, it has swapped correctly.
What If Your New iPhone Has No SIM Slot?
For those who have recently acquired an iPhone 14, 15 or 16, you might find that there’s no SIM slot slot whatsoever. Apple dropped all U.S. iPhones 14, 15, and 16 (including the 15 Plus and 16 Pro Max) without the physical SIM card slot.
All of the US iPhone 14, 15, and 16 are eSIM enabled, meaning there is no tray, no card to insert and no card to lose. In other words, if you’ve tried to upgrade your physical SIM phone, you can’t replace it with an iPhone 14 or later because the new phone supports eSIM only. For converting, refer to the next section.
How to Convert Physical SIM to eSIM on iPhone 14, 15, and 16
For those that are upgrading to the iPhone 14, 15 or 16, it is crucial to know about eSIM since it is only compatible with the devices in the U.S.
When the iPhone 14 was introduced in September 2022, Apple discontinued the inclusion of a physical SIM tray on all U.S. models, pledging that this would make the iPhones more water resistant and also give them more room for a bigger battery.
This was a surprise for many when the iPhone 14 was released. There were more questions about missing SIM trays during these first few weeks than on any other subject. In fact, there is nothing easier about the process of upgrading from a physical SIM phone; all it takes is a grasp of how eSIM works.
eSIM technology is a virtual SIM built into newer iPhones. Some newer models feature dual SIM, which enables users to use two numbers on a single handset, a feature that could be handy if they’re transferring numbers and need both lines active for the time being.

Method 1: Convert on Your Old iPhone
Step 1: In your old iPhone, select Settings > Cellular.
Step 2: Click on the phone number or plan name.
Step 3: Search for Convert to eSIM. This is available with most major carriers in the U.S. including Verizon, AT&T and T-Mobile. If you don’t see it, use Method 2 below.
Step 4: Select Convert to eSIM, and then select OK when prompted.
Step 5: Your phone sends a signal to your carrier, which replaces the SIM in 1-3 minutes. Once you see “Conversion Complete” your physical SIM is deactivated.
Step 6: Take out the physical SIM from your old phone – it’s no longer working. Now you can use eSIM Quick Transfer to transfer your number to the new iPhone.
Method 2: Contact Your Carrier for an eSIM QR Code
Step 1: Contact with your provider or log in to the provider’s website or application.
Step 2: Get an eSIM QR code for the new iPhone. They’ll first confirm your identity.
Step 3: Send the QR code to the person’s email address or share it in the carrier’s application.
Step 4: On your new iPhone, go to Settings > Cellular > Add eSIM > Use QR Code.
Step 5: Use your iPhone’s camera to scan the QR code on your computer screen or printed QR code. Its accuracy is enhanced through good lighting.
Step 6: Confirm the eSIM install by following the prompts. The number will be active in a matter of minutes.
Carrier-Specific Transfer Instructions (Verizon, AT&T, T-Mobile)
eSIM activation is handled by each of the big carriers via their own app or website. The process steps below are as they exist in early 2026, but the buttons’ names change periodically so if a process seems a little different, you are still in the right place.
Verizon Number Transfer Steps
With the My Verizon application, Verizon allows you to transfer your iPhone number easily:
Step 1: Download and log into My Verizon from the App Store.
Step 2: On the menu, select Devices > Manage Device.
Step 3: Pick your own new iPhone and then select Activate a New Device > Transfer a Number.
Step 4: Automatically install the eSIM using the in-app instructions.
Step 5: Want a QR code? On verizon.com click on My Devices, then Activate or Switch Device, then Get a QR Code.
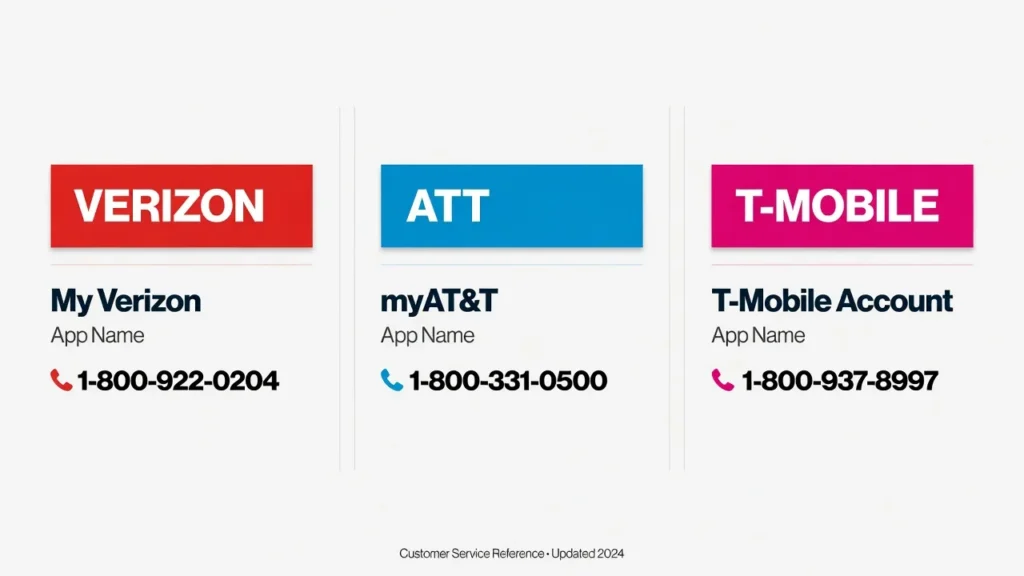
Call Verizon at 1-800-922-0204 (account PIN is required). For any changes in phone numbers, please check verizon.com.
AT&T eSIM Activation Guide
AT&T’s activation is very similar to Verizon’s.
How it works:
Step 1: Download AT&T app from App Store and log in with your myAT&T account.
Step 2: Add a Device, Activate Device, Activate an eSIM.
Step 3: Choose iPhone Device. The app will automatically transfer your number to the new phone if it’s close by or will create a QR code to scan into.
Step 4: Prefer face-to-face assistance? Get your eSIM active in any AT&T retail store; bring your iPhone and photo ID.
AT&T support: 1-800-331-0500 (24/7). If the number has changed, check at att.com.
T-Mobile Number Transfer Process
T-Mobile has one of the easiest eSIM activation processes:
Step 1: Install the T-Mobile app and log in to your T-Mobile ID.
Step 2: Add a Device > Activate eSIM in the Account menu.
Step 3: The app identifies the new iPhone and suggests to move your number. Your old phone from T-Mobile can be automatically transferred if it is nearby.
Step 4: If you need a QR code: It has a QR code generator, which the app will use to create one, or log into t-mobile.com and visit Account > Phone > Get a QR Code for eSIM.
Step 5: If you go in person, drop by any T-Mobile shop with your iPhone and have your ID.
T-Mobile support: 1-800-937-8997 or use the in-app chat. Check with t-mobile.com to see if the number has been updated.
Other Carriers and MVNOs
If you get a different carrier such as Mint Mobile, Cricket Wireless, Metro by T-Mobile, or other MVNOs, it’s the same process. Using their website or app, log into your account and search for an “Activate” or “Manage Devices” section.
The vast majority of MVNOs that operate on Verizon, AT&T or T-Mobile’s infrastructure are compatible with eSIM, but some prepaid carriers still require you to call in to set it up. Before you start, call your provider’s customer service if you have any questions.
How to Transfer Your Number Without Your Old iPhone (Lost, Broken, or Sold)
So I get a lot of this question, and the answer is sort of.Well one of the most common questions that I get is, if you no longer have your old phone and you want to transfer your phone number to a new iphone, can you do that?
Yes, it is possible to use that way here’s how.
Contact Your Carrier for Manual Activation
Your telephone number is not saved in your iPhone. It is associated with your mobile operator’s account. This way, your carrier can put you on your new iPhone without your old phone.
Place a call to your provider’s customer call center and inform them that you are transferring your number to a new iPhone. They will confirm your identity with your PIN on your account, last four digits of your Social Security number or account password. Be serious about this step: It helps prevent your number from being transferred to unauthorized individuals.
The IMEI is a unique number that is assigned to each iPhone and is used by your carrier to associate your phone with your account. You can locate it on your new iPhone by navigating to Settings > General > About and then scroll to IMEI. An alternate method to dial out to your new iPhone’s keypad is to press the number #, followed by 06#.
This activation process takes 10-20 minutes and is done over the phone, which is provided in most cases. If your carrier can create a QR code, you can completely avoid the line on your phone. Go to your carrier’s website, look for “Manage Devices” or “Activate Device” and add an eSIM QR code to your iPhone. Enter Settings > Cellular > Add eSIM on your new iPhone, scan the code on your screen and follow the instructions. This takes a total of about 2 minutes. See the Verizon, AT&T and T-Mobile sections above for carrier specific steps.
In-Store Activation Option
When you don’t have your old phone, visiting a carrier retail store will work well if you would like assistance in person. Take your new iPhone, government-issued photo ID and account details.
The store rep will be able to retrieve your account, check your identity and activate your number immediately. If you’re not familiar with the carrier apps or you’re with a different carrier, then you should activate your phone in-store.
Transferring from Android to iPhone: Number and Contacts
Making the transition from Android to iPhone isn’t as difficult as you might think.
I have helped guide dozens of Android users through this process and the part of the phone number is usually the easiest part — it’s the entire setup that takes longer.
Transferring Your Phone Number from Android
Your phone number is not associated with the Android phone itself but only your carrier account, so really you’re not moving anything. You are just asking your carrier to turn this number on to your new iPhone.
The process is similar to all other carrier activation.
Call the carrier, use their app or go to a store. Provide them with the details of your new iPhone and they’ll update the number. Once the transfer is complete, your Android phone’s service is turned off.
Moving Contacts from Android to iPhone
Your contacts aren’t transferred with your phone number, they must be transferred separately. The fastest way on Google Contacts is to follow these steps:
On your Android phone:
Step 1: Go to the Contacts app and click on the three-dot menu icon in the top-right corner.
Step 2: Select Settings > Move Contacts (or Export Contacts).
Step 3: Select your Gmail account and then click Move. This will copy all contacts to the cloud.
On your iPhone:
Step 4: Tap Settings > Mail > Accounts > Add Account > Google.
Step 5: Log-in with the same Gmail account.
Step 6: Switch the ON/OFF switch for Contacts to ON. All contacts will automatically download to your iPhone (typically in just a minute). Once your contacts are safely on your iPhone, you may want to reset your old Android phone before selling or giving it away.
How to Switch Carriers When Transferring to a New iPhone
Mobile number porting is involved in the process when you are not only looking to upgrade your iPhone, but also to switch between carriers. This is not a same-carrier transfer; it normally takes 1-24 hours, depending on the port of destination most ports will take less than 3 hours.
How Number Porting Works
NO RULES! – DO NOT CANCEL OLD CARRIER!
First, canceling can make your number permanently unavailable to transfer. Rather, your new carrier takes care of it all. Enter your current carrier account number (found on your bill or in your old carrier’s app), account PIN – they’ll do the port request for you.
They will also request the porting authorization code that you will need to prove you have the number and that you are authorizing the switch. You will not have to contact your old carrier in any way.
For a prepaid carrier, the format of the account number may be different – please check the format on your carrier’s website before calling your new carrier.
Timeline and What to Expect
The common time frame for number porting is 1–24 hours. The FCC specifies that carriers have to follow through with a mobile port request within one working day, so if it takes more than 24 hours and you have a port to process, you have a reason to escalate with your new carrier.
I’ve watched the simple ports complete in as brief as 30 minutes. In between the porting time, you might experience periods of weak or no service. It’s OK, it’s being processed.
When the port is completed, your old carrier will automatically cancel your service. Don’t have to call them.
Common Mistakes That Can Lose Your Data (What NOT to Do)
Here are a few key pitfalls to avoid when transferring a phone number. I have witnessed these errors and they can all be avoided.
CRITICAL: Don’t Reset the Wrong Phone
That’s the number one error I see and could lead to data loss. Your new iPhone will ask you to delete all your data when you’re setting it up. This is just a reminder to you, who are using your NEW iPhone, and NOT for your OLD iPhone.
I have seen people accidentally hit Erase on their old phone and lose all pictures, messages and app data in a flash! I have worked on such cases and it’s sad that there is no way to retrieve that data if it has been deleted.
Be sure to read each screen thoroughly before hitting Erase or Reset. If you don’t know which phone a prompt is on, check the battery percentage or the case of the phone to identify which phone it is.
Don’t Move Phones Apart During Transfer
eSIM Quick Transfer and eSIM transfer nearby iPhone use Bluetooth to transfer data between phones.
If the phones lose connection during the transfer, then the transfer will be unsuccessful and you will need to try again. Leave them on the same surface until both screens say “Completed”.
Don’t Skip the Backup
Although the following Quick Transfer method doesn’t require you to make a backup first, I always recommend it. I’ve come across instances where people find out that a photo album they were about to transfer was missing at the last minute, and they’ll restore it in a matter of minutes with their backup. If it didn’t have one, it was gone.
If you haven’t made a backup yet, return to the Quick Backup Safety Net section and make one before you proceed.
Don’t Try eSIM Transfer with a Physical SIM
Unfortunately, if your old iPhone is using a physical SIM card, the eSIM Quick Transfer feature won’t work. Physical SIM cannot be transferred wirelessly.
It will not show up in your settings and you’ll be wondering why it is missing. Follow the Physical SIM Transfer or Convert to eSIM instructions outlined above.
Don’t Sell Your Old Phone Without a Factory Reset
Once you’ve been able to transfer your number and everything is working as it should on your new iPhone, you should make sure to do the right thing with your old one when you sell it, give it away, or trade it in.
I’ve seen this cause some real privacy issues before so when someone gets your old phone, they find your personal pictures, banking apps and iCloud still working. That is a nightmarish situation that can be avoided.
Don’t delete the old phone for at least 24 to 48 hours after transferring to your new phone. This is how to do it safely, and is described in the “Sign Out and Factory Reset Old iPhone” section below.
How to Verify Your Transfer Worked Correctly
Once the transfer is completed, be sure not to take your troubles for granted.
If I ever have to do a transfer, I always check for a few things to ensure it was transferred successfully.
Check Your Number in Settings
The first step I take is to check that the right phone number is on the new iPhone. Check the ‘Settings > General > About’ and find the phone number.
It must be the same number as you. If it is not showing the right number, or if it is showing as “Unknown”, then you will need to call carrier support to correct the activation.
Test Calls, Texts, and Data
The only way to test everything is to use the cellular network. Test phone call to friend or family member to ensure both parties can hear each other well. Send a test text message from your new iPhone and test to ensure incoming messages function as well.
To check the quality of your cellular data transfer speeds, first disable Wi-Fi and then try to load a website.
To find out if your connection is operational and working, first switch Wi-FI off and then try to load a website. Ensure that your wireless provider displays the option of 4G, 5G or LTE in the status bar.
Activate iMessage and FaceTime
iMessage activation process takes 24 hours when the transfer is from Android, but it typically takes a few minutes when transferring from iPhone to iPhone.
In Settings > Messages, ensure that iMessage is turned on and includes your phone number below. While you are there, it is a good time to review your iMessage settings on your new iPhone and adjust any preferences like read receipts before you start using it. Repeat procedure in Settings > FaceTime.
Once your transfer is finished, you will need to re-activate Visual Voicemail by going to “Phone” > “Voicemail” on your new phone if you previously set it up on your old phone.
Most carriers enable Visual Voicemail to automatically resume within a few hours, however taps on Voicemail will initiate the setup if it is not available.
Verify Apps Are Downloading
If you moved all your data with your number, see if your Apps are downloading. Check the Updates tab in the App Store. The majority of the applications should already be installed or in the process of downloading in the background.
Be sure to watch banking apps, payment services and two factor authentication apps, as they may need to be re-verified on your new device before you’ve lost access to your old device.
What to Do With Your Old iPhone After Transfer
After you’ve gotten your new iPhone to run flawlessly, you’re going to need to deal with your old device. Take your time at this process.
Wait and Verify Your New Phone Works Completely
I always advise people to wait 24-48 hours before taking any action with their old iPhone. Try using your new phone for a day or two. Use the phone, apps, texts and ensure that it is functioning properly.
Pay attention to things like call quality, app loading speed, and whether the battery feels like it’s holding up well — if you find your battery draining faster than expected, that is worth investigating before you erase your old phone as a fallback.
Be careful with banking apps, payment services and two factor authentication apps:
These may require re-verification on your new device before you lose access to your old device. Certain applications, especially banking and payment applications, may necessitate another sign-in on the new phone. This is not a transfer failure, but normal security behavior.
Sign Out and Factory Reset Old iPhone
Step 1: On your old iPhone, go to Settings, and click your name at the top.
Step 2: Scroll down to Sign Out and tap it. If prompted, enter the password for your Apple ID, and tap Sign Out to confirm. With this, the iCloud account is deleted from the phone.
Step 3: Go back to Settings > General > Transfer or Reset iPhone.
Step 4: click on Erase All Content and Settings.
Step 5: Enter your passcode and confirm the erase. It takes 5-10 minutes to erase and wipe the data. After it completes, the phone restarts to the “Hello” setup screen, and the erase was successful, the phone is all yours!
Preparing for Trade-In or Resale
Once the factory reset, your old iPhone is ready for what you desire to do with it. It can be traded in via Apple’s Trade In program, sold on a private marketplace or donated to a family member.
If you’re taking it in with the carrier, visit their website to find out what you need to do most carriers will provide a prepaid shipping label to print directly from your account page.
Troubleshooting: When iPhone Number Transfer Doesn’t Work
The transfer process doesn’t always go smoothly. These are the fixes for the most common issues encountered by the users while transferring numbers from iPhone.
“Transfer From Nearby iPhone” Option Not Appearing
First, make sure that both iPhones are running iOS 16 or above; there’s no workaround for iOS versions below 16.
Next, make sure Bluetooth is turned on on both devices and that both phones are unlocked and their screens are on.
Even if eSIM Quick Transfer fails to show up, your old iPhone might still have a physical SIM in it; go to Settings > Cellular to see if eSIM is listed or if Physical SIM is listed.
Transfer Failed or Stuck on “Transferring”
When transfer is stalled or has failed try this troubleshooting checklist:
Both phones should be within 3 feet of each other; Bluetooth connectivity failures are most common.
Check if both phones have a stable and connected Wi-Fi.
If either battery is less than 20%, connect both phones to the battery and then attempt the calculation again.
If it locks up for longer than 30 minutes, unplug both iPhones, and try again.
If the automatic option doesn’t work, you should try the manual option: Settings > Cellular > Add eSIM > Transfer From Nearby iPhone.
Wrong Number or New Number Activated
If you get a different number than you are used to, or if a new number is assigned instead of the one you’re used to, contact your carrier straight away. Typically this occurs by a new line is established rather than the line being transferred from the carrier.
When calling, be sure to provide the account number and the previous phone number as they will be able to cancel the new activation and re-activate you with the proper port in most cases.
“SIM Not Supported” or Activation Error
Determine whether an iPhone is locked or unlocked to a particular carrier. Go to Settings > General > About, scroll down to Carrier Lock. If the information shows that there are no restrictions on the SIM, your phone is unlocked. If it says a carrier name, your phone is a carrier locked phone and can only be activated on the network of that carrier.
If you continue to have errors, contact your carrier support. Alternatively, consult Apple’s official iPhone user guide at support.apple.com for the latest instructions on how to activate your model: carrier provisioning problems may have an Apple-documented workaround.
Frequently Asked Questions: Transferring Your Phone Number to a New iPhone
A1: Transferring cell phone numbers to a new iPhone will depend on the telephone number.
For most people, the eSIM Quick Transfer takes 5-10 minutes to set up for transferring the number from their old phone to the new one. If you are moving your data along with you, it will take 15-30 minutes. It can take 1–24 hours for number porting to finish between carriers with most finished inside 3 hours.
Q2: Do I need to back up my contacts to transfer my phone number to my new iPhone?
Yes, but your contacts and phone number will be different. Previously sync contacts with iCloud or Google. If you are coming from an Android phone, follow the instructions in the “Moving Contacts from Android to iPhone” section, above.
Q3: How to transfer my phone number to a new iPhone?
Both phones must be at least 50% charged, both devices must have Bluetooth turned on, both phones must have a stable wireless connection, you’ll need your carrier account PIN and your Apple ID password. For porting from another carrier, you need to have your current account number and porting authorization code.
Q4: Will I have to contact my carrier to move my phone number?
Not in most cases. If both phones are eSIM compatible and you don’t need to change carriers, you can transfer everything without having to contact anyone. Contact with the carrier is only necessary when you are changing carriers, switching from a physical SIM or if your old phone is not available.
Q5: Will my physical SIM card fit with my iPhone 14 or 15?
The iPhone 14, 15, and 16 are sold in the United States as eSIM-only phones with a phone SIM card slot. This will require you to ask your carrier to convert your physical SIM to eSIM either before or during the transfer. The conversion steps are covered in the “How to Convert Physical SIM to eSIM” section above.
Q6: If my iPhone is lost or broken, can I get my number transferred to a new iPhone?
Yes. Your phone number is not part of the device but rather is associated with the carrier account. Call your carrier, tell them your identity and they can activate your number on your new phone without you needing the old phone. Also, most carriers will provide you with a QR code to activate eSIM if you do not want to make a phone call.
A7: Once you transfer your number, your old iPhone will be deactivated and cannot be used.
When the transfer is done, your old iPhone’s cell phone service turns off automatically. It will still connect to Wi-Fi but not to or from a cell phone. Sign out from iCloud and factory reset your old iPhone as set out above before selling, trading in or giving it away.
Q8: How am I going to know that my transfer was successful?
Go to Settings > General > About and make sure that your phone number is correct. Test your cellphone for calls, text messages, and load a webpage using cell data (Wi-Fi off). If they all are working, your transfer is complete. Check to ensure your phone number appears in the Settings section for iMessage and FaceTime.
In fact, transferring a phone number to a new iPhone is one of the simpler aspects of the upgrade once you’ve discovered the best approach for your situation. eSIM Quick Transfer has an average time of less than 10 minutes for most cases.
In case of older phones or no-SIM-slot, the conversion steps make it clear. If you have already lost your old cell phone, your cell phone provider can activate you today.
The preparation checklist, the backup, the steps of verifying that follow — these are not extras, these are essential, and that’s not an exaggeration. They’re the difference between a seamless 10-minute transfer and a stressful hour of troubleshooting.
If you found yourself in a situation that isn’t addressed in this post, leave a question in the comments, I check them daily and am more than happy to help! Congratulations on the new iPhone!
Note: Carrier policies, device requirements and app interfaces are correct up to early 2026. It is important to check with your individual provider when your situation is different than what is described above. The latest Apple directions can be found on support.apple.com.


